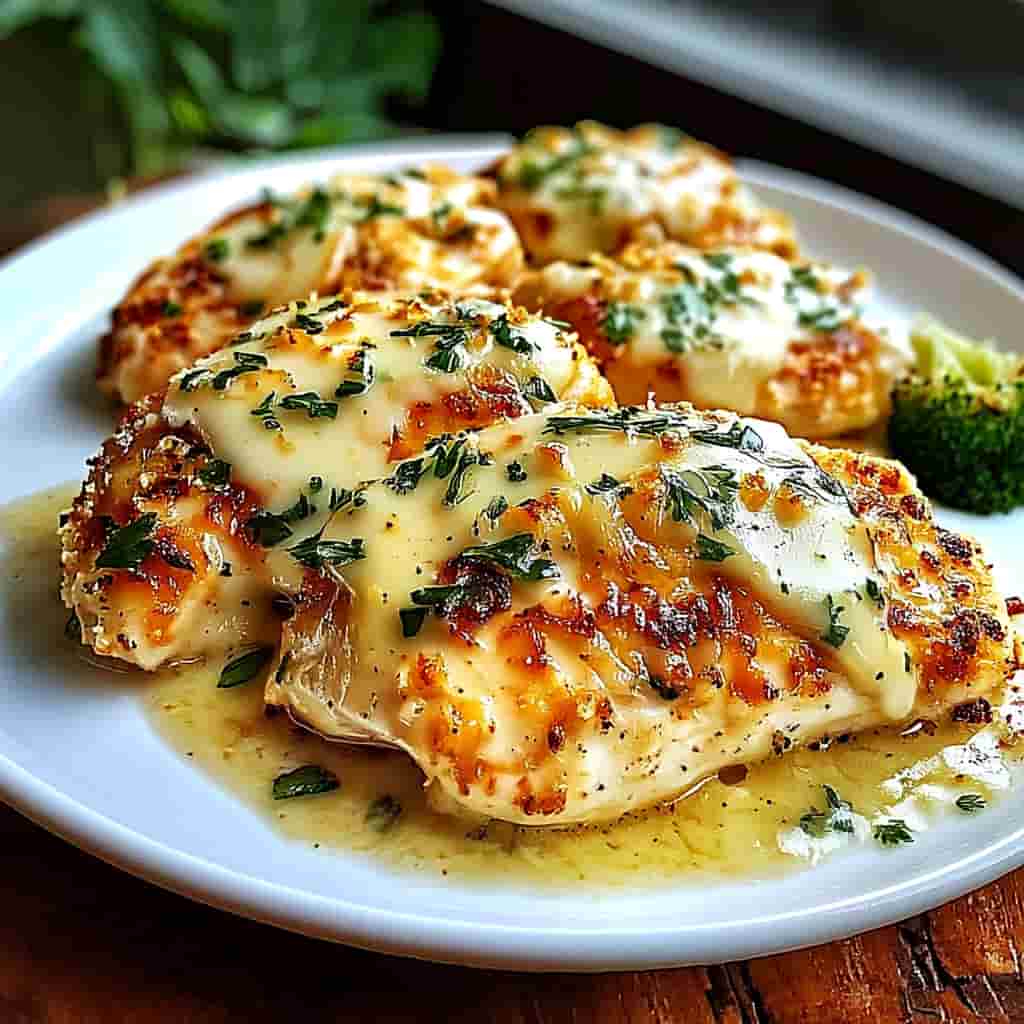
Cast Iron Chicken: How to Make the Perfect Juicy Chicken Breast
If there’s one dish every home cook should master, it’s cast iron chicken. Whether you’re cooking for weeknight meals or meal prepping for the week ahead, juicy chicken breast cooked in a cast iron skillet is a simple, flavor-packed staple. In this article, we’ll walk through every step to getting it just right—from seasoning your chicken properly to making sure it doesn’t stick or burn. You’ll learn essential techniques and pro tips to make sure your cast iron chicken turns out tender, golden-brown, and cooked to perfection every time.
Table of Contents

Cast Iron Chicken
- Total Time: 30 minutes
- Yield: 4 chicken breasts 1x
Description
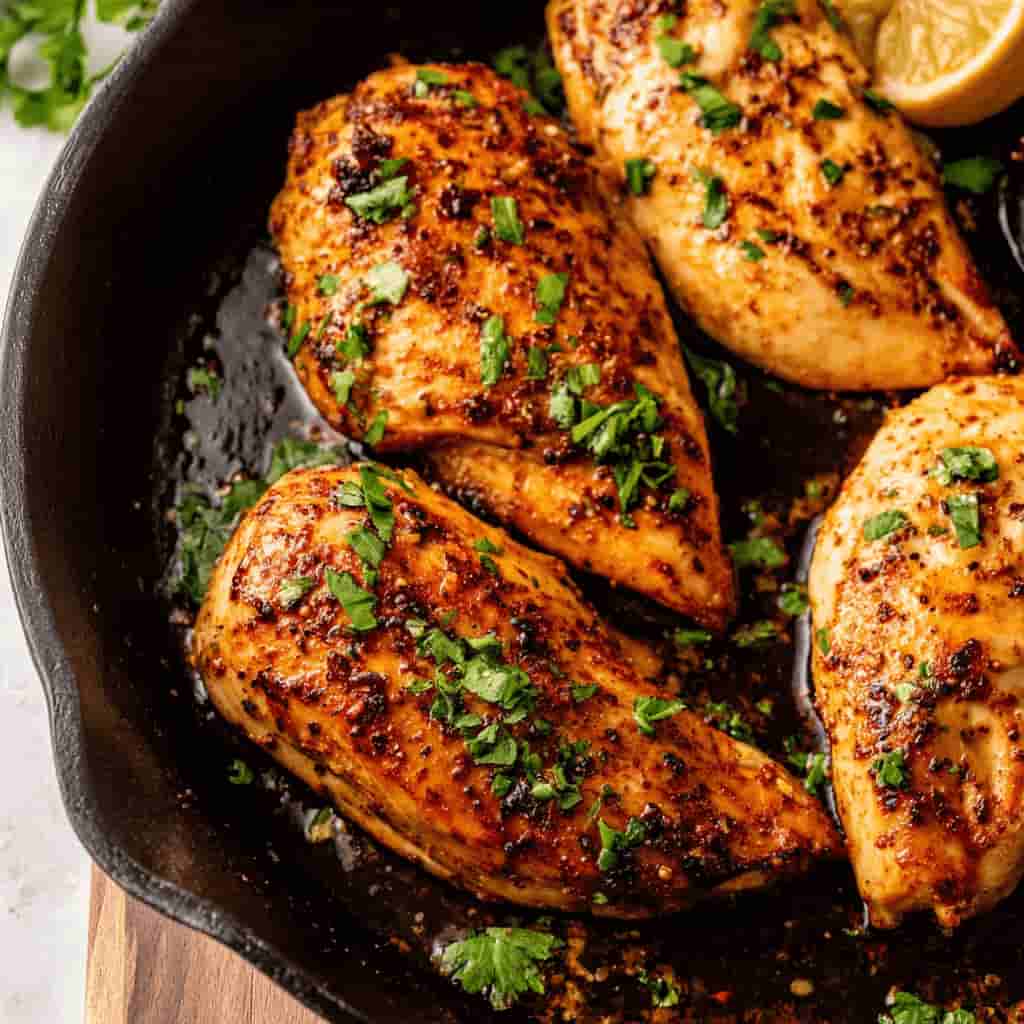
Juicy, golden-brown cast iron chicken breasts seared to perfection in avocado oil and finished with lemon-butter basting. A quick, flavorful dinner staple ready in 30 minutes.
Ingredients
4 chicken breasts
1½ teaspoon salt
2 teaspoon oregano
2 teaspoon garlic powder
1 teaspoon black pepper
2 tbsp avocado oil
1 lemon, halved
2 tbsp butter
Instructions
1. Place your cast iron over medium heat. While the cast iron is heating, season the chicken breasts with salt, pepper, garlic powder, and oregano.
2. Once the cast iron is hot, add the avocado oil. Place each chicken breast flat on the cast iron. Add half of a lemon cut side down on the skillet. You may need to do this in 2 batches depending on the size of your cast iron.
3. Sear the chicken breast for 7 minutes and then flip it over. Cook for another 7 minutes and check the temperature. Use tongs to roll the chicken breast onto its edges to cook the sides of the breast. Leave the chicken on the cast iron until it reaches 165℉.
4. Once the chicken reaches 165℉, remove the pan from the heat and add the butter to the pan near the lemon. Use a spoon to baste the chicken in the butter. Then use tongs to grab the lemon and squeeze it over the chicken. Remove the chicken and let it rest for 5-10 minutes before cutting it.
5. Once the chicken has rested, slice it and serve with salad or vegetables.
Notes
Tip: Always let the chicken rest before slicing to lock in juices. For a smoky variation, add smoked paprika or chili powder.
- Prep Time: 15 minutes
- Cook Time: 15 minutes
- Category: Hot Meals
- Method: Skillet
- Cuisine: American, Italian
Nutrition
- Serving Size: 1 chicken breast
- Calories: 385
- Sugar: 1g
- Sodium: 1762mg
- Fat: 19g
- Saturated Fat: 6g
- Unsaturated Fat: 10g
- Trans Fat: 0.3g
- Carbohydrates: 4g
- Fiber: 1g
- Protein: 49g
- Cholesterol: 160mg
The Story Behind Our Cast Iron Chicken
Why We Keep Coming Back to Cast Iron Chicken
Some of our best kitchen wins have happened when dinner had to be fast and fail-proof. Cast iron chicken became a go-to in our home when life got hectic—work deadlines, soccer practice, and a toddler who only wants chicken. Sarah still remembers the night she nailed it: golden on the outside, juicy in the middle, with a lemon butter finish that made the whole kitchen smell amazing.
That one skillet meal reminded us why we started Easy Recipes To Go in the first place. We believe anyone can cook flavorful, real meals with just a few ingredients—and cast iron chicken is proof.
With this technique, you don’t need to be a chef. You just need one trusty skillet and a little know-how. That’s the beauty of this recipe—it fits into real life, and it delivers real flavor.
And if you’re already exploring grilled options, our Grilled Chicken Nuggets vs Chick-fil-A comparison dives into flavor and prep simplicity, especially if you’re transitioning from fast food to home-cooked meals.
What Makes This Cast Iron Chicken So Good?
This version focuses on chicken breasts, seasoned simply and seared in avocado oil, then finished with butter and fresh lemon. The cast iron creates a crisp, caramelized crust while locking in moisture—no rubbery texture, no dryness. It’s a method we love just as much for weekday cooking as we do for meal prep Sundays.
Looking for variations? You might also enjoy our deep dive into Cast Iron Chicken Thighs for darker, richer cuts using the same base method.
Mastering the Cast Iron Chicken Method.
Mastering the Cast Iron Chicken Method
How to Make Sure Chicken Doesn’t Stick to Cast Iron
A properly heated cast iron skillet helps create a non-stick surface naturally. If you’re curious about how cast iron works and why it’s so effective, cast-iron cookware on Wikipedia gives a great overview of heat retention, seasoning, and skillet maintenance. One of the most common concerns when cooking cast iron chicken is sticking. If you’ve ever tried to flip your chicken and ended up tearing the skin or the outer layer of meat, you’re not alone. The good news? There’s a simple fix.
Start by preheating your cast iron skillet for at least 5 minutes over medium heat. This step ensures an even cooking surface. A properly heated pan will help the oil spread evenly, creating a natural barrier between the meat and the metal.
Next, use a high-smoke-point oil like avocado oil. Unlike olive oil, which can burn at high temperatures, avocado oil holds up to the heat and creates a better sear. Once the oil shimmers, gently place the seasoned chicken breasts into the skillet—don’t move them right away. Let the crust form for at least 7 minutes before flipping.
Still worried? We’ve got tips for grilled options too. If you like this approach, check out how we season and time our Grilled Chicken Nuggets – Chick-fil-A Style with just the right nonstick techniques.
Avoiding Burnt Chicken and Overcooking
One of the best parts about cast iron chicken is its ability to sear quickly and retain heat. But that also means it’s easy to overdo it if you’re not watching the timing.
The secret is temperature control. Medium heat is ideal—hot enough for a sear, not so hot that the outside burns before the inside cooks through. Always use an instant-read thermometer and aim for 165°F at the thickest part. This step alone saves you from dried-out chicken.
After flipping the chicken, finish it with butter and a squeeze of lemon. This not only keeps the flavor fresh, but also creates a light pan sauce as it mixes with the browned bits in the skillet.
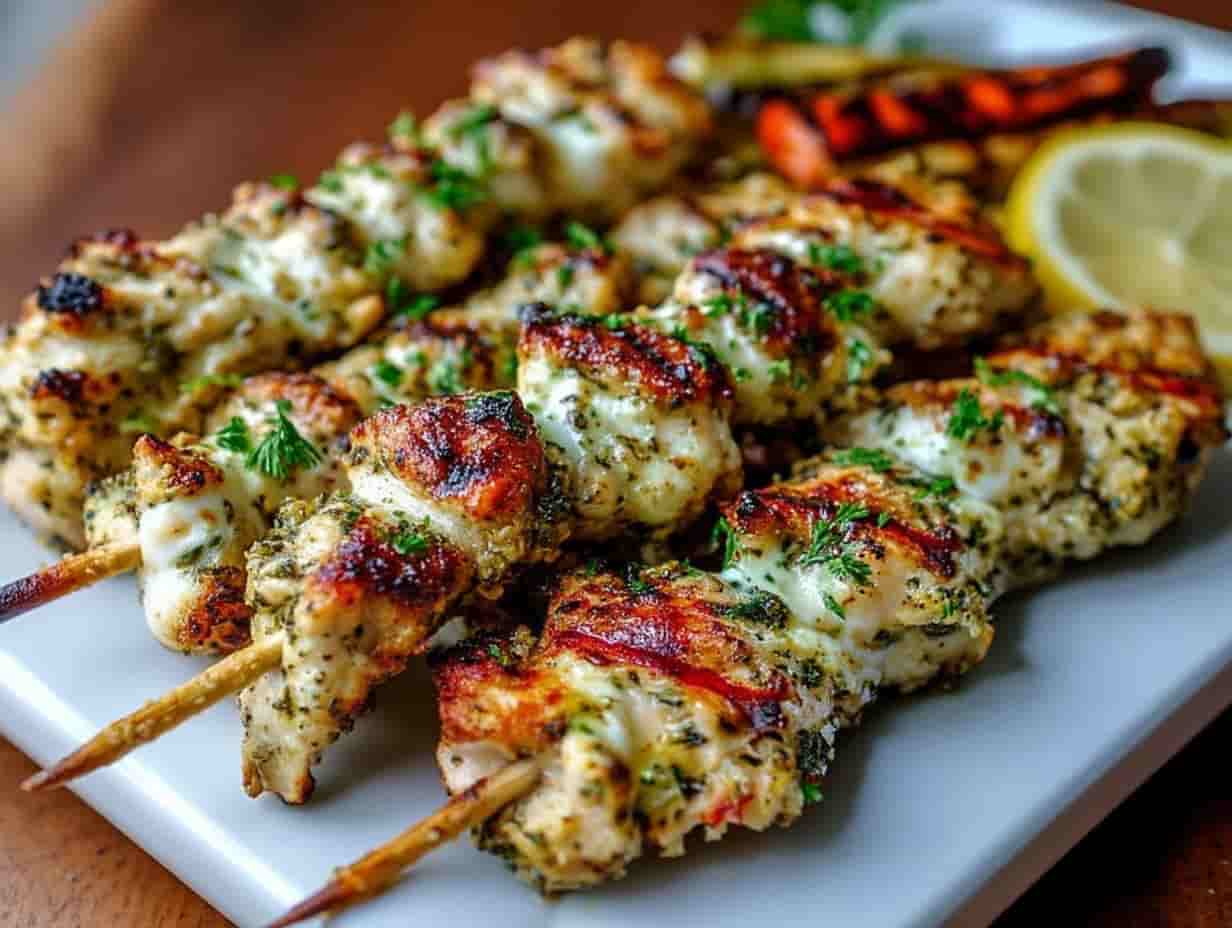
You can find this finishing trick in our Garlic Parmesan Chicken Skewers too—it’s one of our go-to hacks for restaurant-style results at home.
Cast Iron Chicken Beyond the Breast
Cooking a Whole Cast Iron Chicken
Yes, you can absolutely cook a cast iron chicken whole—and it’s simpler than it sounds. The key is spatchcocking, which means removing the backbone so the chicken lays flat. This helps the bird cook evenly in a skillet and gives you that same golden-brown sear you get with chicken breasts.
Start by seasoning the chicken generously with salt, pepper, garlic powder, and oregano. Preheat your oven to 450°F and place your cast iron skillet on the stove over medium-high heat. Sear the skin side down for about 5–7 minutes to lock in color, then flip it and transfer the skillet to the oven. Roast for about 30–40 minutes or until the internal temperature reaches 165°F in the thickest part of the thigh.
To keep it juicy, baste with butter and lemon juice in the final minutes, just like we do with chicken breasts. Serve it with roasted vegetables or a crisp green salad. This version turns a basic weeknight meal into a rustic centerpiece.
Want to explore other cut options? Dive into our Cast Iron Chicken Breast guide for step-by-step tips on pan-searing leaner cuts without drying them out.

Trying Cast Iron Chicken Thighs
If you prefer dark meat, cast iron chicken thighs are rich, forgiving, and deeply flavorful. They have more fat than breasts, which makes them harder to overcook—perfect for beginners or busy nights.
Season them similarly and sear skin-side down until the skin crisps up—about 8–10 minutes. Flip and cook another 6–8 minutes, or until the meat reaches 175°F. Yes, thighs are safe to eat at 165°F, but going a bit higher makes them tender without drying out.
Want a closer look at how we get crispy edges and juicy centers? Visit our full breakdown on Cast Iron Chicken Thighs—a must for lovers of bold, juicy chicken flavor.
Final Tips
How to Avoid Common Mistakes with Cast Iron Chicken
Even seasoned home cooks hit a few snags when making cast iron chicken. Here are quick answers to the most asked questions:
How to make sure chicken doesn’t stick to cast iron?
Make sure your skillet is hot before the chicken goes in. A cold pan is the number one reason chicken sticks. Also, don’t move the meat too soon—once a good crust forms, it will release naturally.
How long does chicken take on cast iron?
For boneless chicken breasts, it usually takes about 7 minutes per side over medium heat. For bone-in cuts or a whole spatchcocked chicken, the total time can range from 30–40 minutes. Use a thermometer to check: 165°F for breasts, 175°F for thighs.
How to keep chicken from burning on cast iron?
Medium heat is your friend. Cast iron holds heat extremely well, so turning the dial too high will burn the outside before the inside cooks. Use oil with a high smoke point, and always monitor the heat throughout.
What foods shouldn’t be cooked in cast iron?
Avoid cooking acidic ingredients (like tomatoes or vinegar-based sauces) for long periods in cast iron, especially if your skillet isn’t well-seasoned. These can wear down the seasoning layer. And unless your skillet is enameled, steer clear of storing leftovers in it—cast iron is for cooking, not storing.
From Prep to Plate: Your 30-Minute Cast Iron Chicken Plan
You don’t need a lot of ingredients, and you don’t need hours. With just 15 minutes of prep and 15 minutes of cooking, your cast iron chicken is ready in 30 minutes flat. Add butter and lemon at the end for a bright finish. Let it rest for 5–10 minutes before slicing, and serve with your favorite sides.
Need a lighter option? Pair it with one of our easy Grilled Chicken Strips salads for a satisfying lunch or dinner rotation.
Looking for full nutrition breakdowns? You’ll love our analysis of Chick-fil-A Grilled Chicken Nuggets Calories to see how home-cooked meals compare.
Frequently Asked Questions
How to make sure chicken doesn’t stick to cast iron?
Preheat the skillet for 5 minutes, use avocado oil, and don’t flip the chicken too early.
How long does chicken take on cast iron?
Boneless breasts take around 14–15 minutes total. Bone-in pieces or whole chickens take 30–40 minutes depending on thickness.
How to keep chicken from burning on cast iron?
Use medium heat, avoid overcrowding the skillet, and monitor closely. Always finish with butter to cool the pan slightly.
What foods cannot be cooked in cast iron?
Highly acidic foods (tomatoes, vinegar) and long-simmered citrus-based dishes can strip seasoning unless your skillet is enameled.
Conclusion
Cooking cast iron chicken is more than just a method—it’s a kitchen confidence boost. With just one skillet, a few pantry staples, and the right timing, you can turn basic chicken breasts into something truly crave-worthy. Whether you’re meal prepping for the week or serving dinner guests, this recipe delivers juicy, golden chicken every time.
We’ve shown you how to keep it from sticking, how to avoid burning, and how to confidently adapt the recipe to a whole bird or chicken thighs. Once you try this, you’ll wonder why you ever baked dry chicken in the oven.
And the best part? It’s all done in under 30 minutes—just like our weeknight favorites, from Grilled Chicken Nuggets – Chick-fil-A Style to Garlic Parmesan Chicken Skewers.
So grab your skillet, season those chicken breasts, and bring on the flavor. You’ve got this.